

When it comes to aviation, safety is paramount. Before every flight, pilots perform a thorough pre-flight check to ensure that their aircraft is airworthy and ready for the mission ahead. Whether you are a student pilot or an experienced aviator, mastering the pre-flight inspection is a non-negotiable skill. Not only does it keep you legal, but it could save your life.
Let’s break down the pre-flight checklist step-by-step, explain the why behind each item, and offer practical tips along the way.
Why Pre-Flight Checks Matter
Every aircraft is a complex machine, and even a minor issue can have serious consequences. The pre-flight check helps you:
- Identify obvious mechanical issues.
- Confirm that required documents are onboard.
- Ensure the aircraft is loaded properly.
- Verify fuel and oil levels.
- Check for any signs of wear, damage, or leaks.
The Federal Aviation Administration (FAA) requires pilots to determine that the aircraft is in “a condition for safe flight.” A proper pre-flight walk around is how you meet this obligation.
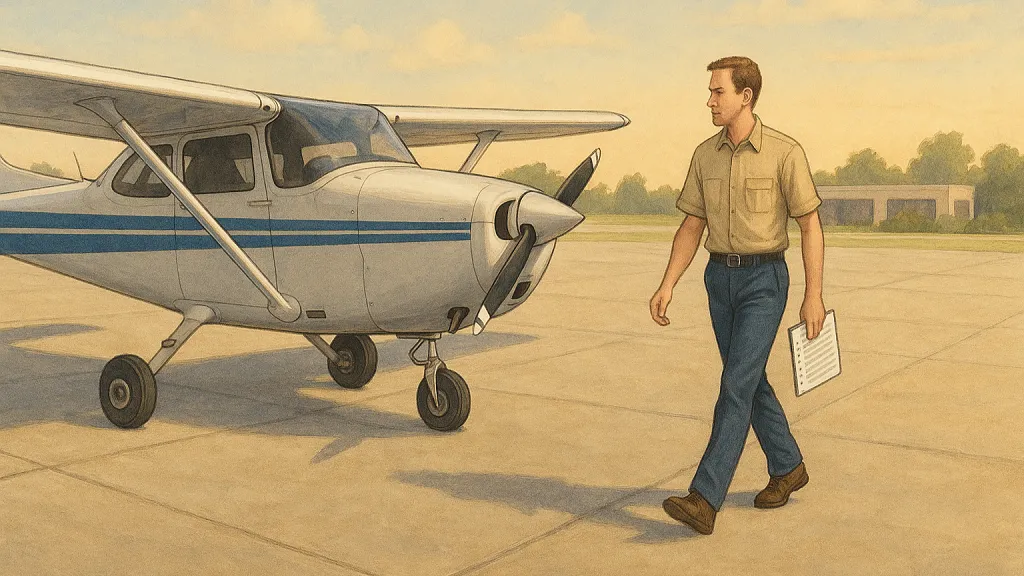
Before You Start: Pre-Inspection Preparation
Start by gathering essential documents:
- Airworthiness Certificate
- Registration Certificate
- Operating Limitations (POH or AFM)
- Weight and Balance Data
Checking the weather conditions and NOTAMs (Notices to Airmen) for your departure and destination airports is a crucial step. Look at METARs and TAFs for real-time and forecasted weather, paying special attention to winds, visibility, and ceilings. Decode PIREPs for pilot-reported weather phenomena and examine winds aloft forecasts to understand what you might encounter en route.
Review NOTAMs to catch temporary flight restrictions (TFRs), runway closures, or other important operational considerations. Differentiating between “D” NOTAMs (for distant or en-route notices) and “FDC” NOTAMs (regulatory changes) can help you avoid surprises.
Additionally, verify your weight and balance calculations. An overloaded or improperly balanced aircraft can be dangerously unstable.
Ensure you have these tools ready:
- A flashlight (for low-light inspections)
- A fuel tester
- A clean rag
- Your printed or electronic checklist
- A kneeboard for note-taking
Flight planning should also be reviewed. Double-check that you have enough fuel for the entire flight, including reserves for alternate airports and contingencies.
The Pre-Flight Checklist: A Step-by-Step Guide
1. General Aircraft Condition
As you approach the aircraft, take in the general appearance:
- Look for obvious signs of damage.
- Check the aircraft’s attitude (is it leaning? It could indicate a flat tire).
- Look for fluids on the ground which may suggest a leak.
- Check tie-downs and chocks.
2. Cockpit Check
Inside the cockpit:
- Remove control locks.
- Verify that all switches are OFF.
- Turn on the master switch to check fuel quantity gauges.
- Test lights, pitot heat, and avionics if applicable.
- Cycle flaps down and up.
- Check that flight controls move freely and correctly.
- Verify that circuit breakers are all in.
- Confirm that all required documents are present.
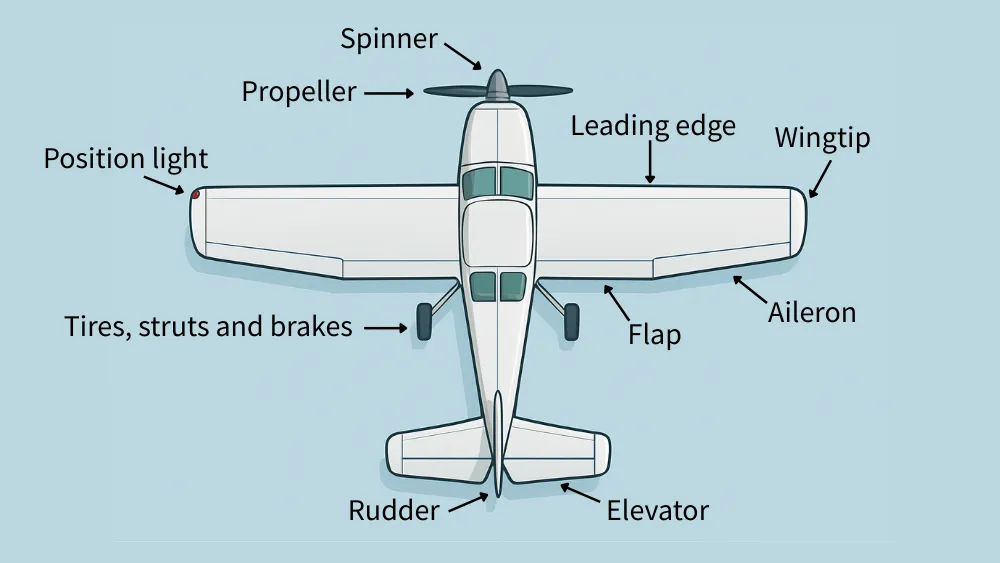
3. Empennage (Tail Section)
Walk to the tail section:
- Inspect the horizontal and vertical stabilizers for dents or cracks.
- Check the rudder and elevator for free and correct movement.
- Look for loose fasteners and frayed cables.
- Inspect antennas for secure mounting.
4. Right Wing
Move to the right wingtip and work inward:
- Check the wingtip and navigation lights.
- Inspect the aileron and flap for movement and security.
- Check hinges and control rods.
- Drain a fuel sample and inspect for water, sediment, or color contamination.
- Check the fuel cap for tightness and gasket condition.
- Inspect the leading edge for bird strikes or dents.
- Check the landing gear: tire pressure, tread condition, brakes, and struts.
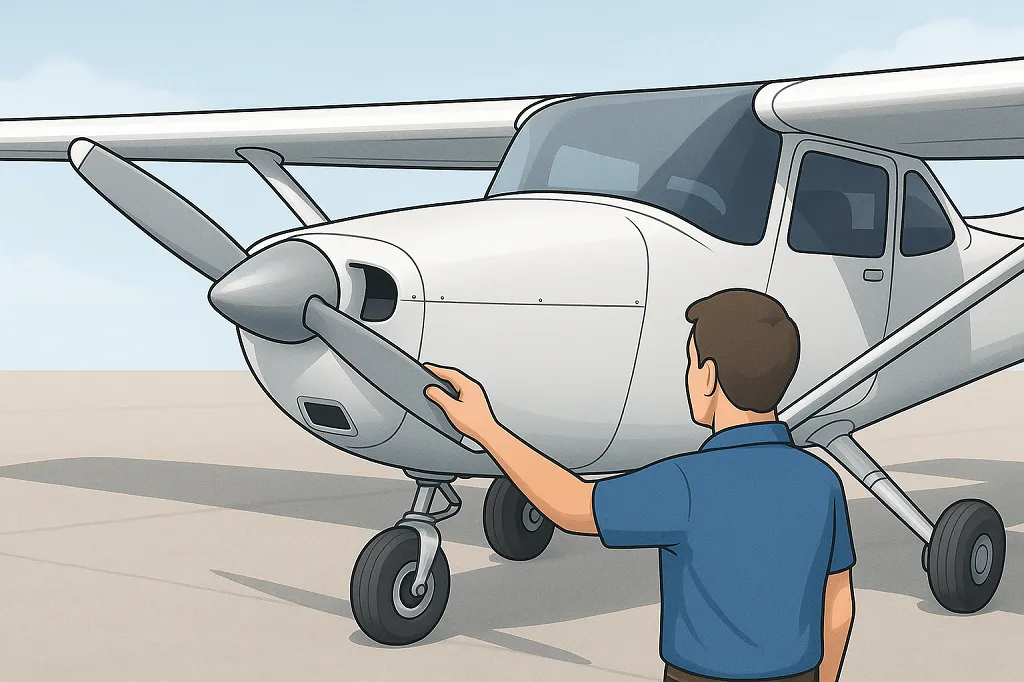
5. Nose Section
At the front:
- Inspect the propeller for nicks, cracks, or other damage.
- Check the spinner for security.
- Inspect the engine cowling for security and check the oil level.
- Examine the air intake and carburetor air filter.
- Check for fluid leaks or stains.
- Inspect the nose gear for tire condition, strut inflation, and overall integrity.
6. Left Wing
Mirror the right-wing inspection:
- Wingtip, light lenses.
- Aileron and flap movement.
- Hinges, control rods.
- Drain a fuel sample.
- Secure fuel cap.
- Inspect leading edge.
- Landing gear.
7. Fuselage and Undercarriage
Complete the walk around by:
- Inspecting fuselage skin for dents, corrosion, or loose rivets.
- Ensuring inspection panels are secure.
- Checking static ports and pitot tube for obstructions.
- Looking for evidence of leaks, especially near fuel drains.
Special Considerations
Fuel
Contaminated fuel is one of the most common causes of engine failure. Always:
- Drain fuel from all sumps and fuel strainer.
- Look for water (beading or separate layers) or debris.
- Verify fuel color: 100LL is blue, Jet A is straw-colored.
- Check after fueling, even if someone else did it.
- Understand that condensation can form overnight, especially in humid conditions.
Tires and Brakes
Your landing gear is the first point of contact with the runway:
- Check tire inflation.
- Look for tread wear, deep cuts, or visible cords.
- Inspect brakes for pad wear and hydraulic leaks.
Flight Controls
Ensure that:
- No binding or unusual resistance is present.
- Surfaces move freely and fully.
- Control stops are firm.
- There’s no unusual noise during movement.
Lights
Visibility is life-saving:
- Check navigation lights.
- Inspect strobes or beacons.
- Verify that landing and taxi lights work.
The Pre-Flight Walk Around Mindset
Treat your pre-flight as if your life depends on it. Because it does.
- Be systematic and follow the same flow every time.
- Never rush; haste leads to mistakes.
- Investigate anything that looks or feels “off.”
- Get another set of eyes if you’re unsure.
Common Mistakes to Avoid
- Skipping steps: Follow your checklist.
- Rushing: Take your time; don’t let distractions get you.
- Assuming fuel quality: Always check, even if you fueled it yourself.
- Ignoring minor damage: What seems small on the ground could be catastrophic in flight.
Pre-Flight Check Procedure for Different Aircraft Types
While the fundamentals are the same, variations exist:
- High-wing vs Low-wing Aircraft: Fuel drains are easier on high-wings; always remember to check.
- Tailwheel Aircraft: Pay extra attention to the tailwheel assembly and tail surfaces.
- Complex Aircraft: Additional checks for retractable gear, constant-speed propellers, and turbochargers.
Always consult the Pilot’s Operating Handbook (POH) or Aircraft Flight Manual (AFM) for specific procedures for your aircraft.
What to Do if You Find a Problem
- Consult maintenance logs to verify if the issue has been deferred.
- Notify a certified mechanic.
- If the problem affects airworthiness, do not fly.
- Know your Minimum Equipment List (MEL) if your aircraft is equipped with one.
You should also know the minimum instruments for vfr flight.
Incorporating Technology: Apps and Tools
Modern pilots have digital aids:
- Electronic checklists via apps like ForeFlight.
- Real-time weather updates.
- Flight logging and maintenance tracking.
However, technology should supplement, not replace, a thorough, physical pre-flight check.
The Importance of Consistency
Consistency is your safety net:
- Use the same inspection flow each time.
- Memorize major steps but rely on checklists.
- Regular practice reduces the chance of missing something important.
FAQ: Pre-Flight Check Essentials
Q: How long should a thorough pre-flight inspection take?
A: For student pilots, it can take 20–30 minutes initially. Experienced pilots may complete it in about 10–15 minutes without rushing.
Q: Should I pre-flight after every refueling?
A: Yes. Fuel contamination can occur at any time. Always sample the fuel and verify caps are secured.
Q: What should I do if I find water in my fuel sample?
A: Drain until clear samples appear. If water persists after several drains, do not fly and seek maintenance help.
Q: How often should checklists be updated?
A: Review and update checklists whenever procedures or aircraft configurations change. Always use the latest POH data.
Q: Are electronic checklists acceptable during a pre-flight?
A: Yes, but ensure your device is fully charged and accessible. Always have a backup in case of technical failure.
Q: Can weather conditions affect pre-flight checks?
A: Absolutely. Cold can stiffen control surfaces; heat can affect tire pressure. Adjust your inspection attention based on conditions.
Final Thoughts
Mastering the pre-flight check is an essential skill for every pilot. It’s more than a regulatory requirement; it’s your personal assurance that you’re giving yourself the best possible chance of a safe flight.
The more flights you complete, the easier and more intuitive this process becomes, but it should never become a mindless routine. Stay sharp. Stay thorough. Your future self will thank you.
Sources:
AOPA: to Pre-Flight an Airplane
360 Aviation Life: Aircraft Preflight Inspection
Fly8MA: Preflight Check
FAA Medium: Perfecting Your Preflight Inspection
Recent Posts
FAA MOSAIC Final Rule: What Pilots, Manufacturers, and the Aviation Community Need to Know
Learn how the FAA’s MOSAIC final rule revolutionizes Light-Sport Aircraft certification, expands Sport Pilot privileges, and reshapes general aviation. See what’s changing, when it takes effect,...
Student Pilot Insurance: Essential Coverage for Aspiring Flyers
Discover how student pilot insurance can protect your flying dreams. Get expert tips and coverage options to ensure your safety and peace of mind.